Saturday 28 May 2016

Rubber Dance card with Scrapmatts


This is my fancy new card made with a gorgeous Rubber Dance Night cat stamp and some chipboards as the frame and the sentiment.
 I colored the Rubber Dance image with my new Zig Real Brush markers and without any water, just plain color mixing and I really love the result . It's shiny and bright and the stamp is seen in the most perfect way.
The frame is heat embossed with black powder and glued over silver dry embossed card piece (SCRAPMATTS). The sentiment says it all: cats and stars and a good sleep are simple pleasures in life.
I love them all, including my very fat old cat. I hope that you love my card.


I also enter this to a couple of web challenges:
Anything goes- Simon Says

Scrapmatts May inspiration


Hello my dear crafty friends and welcome to my May Scrapmatts inspiration.
After two months of scrapbooking I decided to move to some Mixed Media art and to my favorite Steampunk style.
So the first project is this Steampunk book cover I made using DCVW cardstock and Scrapmatts gorgeous stencil and Steampunk pieces.
The background cardstock was covered with letters from Scrapmatts Alphabet stencil using clear embossing ink and gold embossing powder.
Then I added another layer- using Sizzix die and Scrapmatts stencil on the non die cut part of this layer. This time I used Circles stencil  with the same heat embossing technique.
Now it was a chipboard playtime!
First I painted the Steampunk chipboard with DecoArt paints using Andy Skinners faux rust combo of dark grey and dark red  paints. 
Then I painted the Wings mostly with dark Turquoise paint with a bit of brown over it. The background  wings layer was painted with gold paint and I glued them one over another with Glossy Accents.
The small chipboard key and key hole were painted with gold paint and a bit of patina antiquing  cream over them, just same as the title words. 
 I added two chipboard hinges and arranged the whole piece over a kind of book folded leather look cardstock.
Two piece of washi tape were added to make this " book" to look real.


Scrapmatts products used:

I enter this to some web challenges too
Mixed media world- Grungy with shine
Country view challenges- use a stencil

Friday 27 May 2016

Remember layout

Hello my dear crafty friends!
Today I want to share a new almost monochromatic layout I made for Scrapmatts blog with Prima May BAP sketch.
Those are photos of my dear daughter and her husband on their wedding day a year ago.
I loved those artistic  shots and decided to make a layout with two of them.
 I made this layout with Prima cardstocks, flowers, mediums, paints, dies , chipboard stickers, wood pieces, blings etc. The only non Prima products here are Scrapmatts chipboards.
 I enter this piece to some web challenges too :
Prima BAP
Berry71bleu- color inspiration
Country view challenges- use a stencil

Rebecca Baer tutorial


Hello my dear crafty friends and welcome to my Mixed Media tutorial made for Rebecca Baer blog with her most gorgeous stencils.
This time  I used two of small stencils that are pretty much the same style- kind of a Steampunk and I made a gift card hand made holder  using those delicious stencils.
Here is my tutorial for  you- easy to follow and easy to make if and when you have Rebecca Baer's stencils.
1. Use DecoArt Crackle Paste over Rebecca Baer Steampunk Pocket Watch small stencil and Stempunk Clcok stencil small on two  pieces of thick white cardstock. Let the crackle paste  to be totally dry and crackles well seen before you move to step 2.


2. Pick three deep vintage  colors of mists (I used Tattered Angels, but any brand will be good ) and mist the dry stencilled surfaces. Wipe the mist from crackled areas with baby wipe (don't do it with dry paper towel as it removes some crackles too ).


3. When your misted pieces are dry add some gold foil/leaves using DecoArt glaze. I don't have any special glue that  was specially made for gold leaves, but I found that glaze of any kind works perfect for this matter.
Let the gold leaves to be totally dry before you move to the next step.


4. As my pieces looked too bright I misted them both with golden mist to get this more mute look.

5. I didn't take photos of the next steps- any crafter can make this " book cover" shaped gift card holder wrapped with nice paper from outside and covered with another cardstock inside.
What I did for the next step was to cover the entire stencilled pieces with a thick layer of liquid clear resin. This step is essential, unless you what to feel all small  crackle paste pieces with your fingers. Let the glaze resin to be totally dry and then cut it to fit the gift card holder cover and glue both pieces from both sides as shown. Add the ribbon to close the holder.
 This is how it looks from the front side.


And this is this project's back side- pretty similar, but  still different.


And just one last close up to the crackle paste, gold leaves and the best ever stencil!


Thursday 26 May 2016

Same die set- different cards with Die Versions


Hello my dear crafty friends and welcome to my second post made for Die Versions blog.
 Today I am going to share two different cards and  totally different styles made with the very same DV die set: Stitched Nesting Circles.
I need to say that since those dies are released I am totally addicted to them and to their " brothers and sisters" aka all Stitched Nesting dies in the DV shop.
 Their sizes are just perfect for cardmaking and they are so versatile in uses.
 So the first card is a very modern, one layer clean and simple Mixed Media card.
 I die cut  four different Stitched circles  in  white cardstock. Then I die cut same sizes of circles from different  colored cardstocks and made inlays inside the white cardstock. As the next step I  stamped the sentiment on the lower corner (IBS stamps) and misted and painted the panel with Tattered Angels mists.
A few piece of washi tape were added for a bit of interest and some black contrast.


 The second card was made with the very same Stitched Nesting Circles dies, but in a kind of more shabby, vintage look.
 I used DCWV cardstocks, dry embossed the background and added  five circle over the card with 3d foam glue. The Small Wordlet  THANKS DV sentiment was die cut three times  to make it totally visible.


To my wonderful Mom card with IBS

Hello my dear crafty friends and welcome to my second May post made for Inspired by Stamping blog.


 This card maybe looks simple, but I actually used my own totally new background technique and I made a small tutorial for you to try it.I called it Faux Lace paper  technique and I think that nobody made something like this before. And if I am wrong, sorry- I didn't find anything  like this on the web.
 So here we go!
1. Make a few doily die cuts from white vellum paper and glue them over one side of double sided glue sheet.


 Glue clear transparency over the upper glue side.


Glue the sheet with the second sticky side to another vellum paper. I used printed with gold script vellum, but is can be colored one or even simple white.


 Now your have a piece of " paper" that is made of transparency,  vellum die cuts over double sided glue sheet and another vellum. Treat it as a cardstock piece: use it as your background, die cut it, color the back  with alcohol inks etc. Try more die cut shapes and more colors inside and outside. I just made the card size background and added it over two more cardstock layers for make this card.

2. Stamp Inspired by Stamping Butterflies with clear embossing ink and heat emboss with four different glitter embossing powders. Hand cut the butterflies and arrange over the card.


3.Stamp Inspired by Stamping Mother's day sentiment -from a retired  stamp set, but I wanted to make a Mother's day card, so I used this stamp- with black permanent ink over white cardstock. Die cut the stitched circle and add to another larger stitched die cut circle as shown.

4. Add some bling string  and a few sequins.


Enjoy your card!
Stamps used:

Inspired by Stamping Butterflies Stamp Set

I enter this card to a couple of web challenges:
WOW! Embossing powders- I used their powders on this card
Teal and purple for Dare2bArtzy
 Anything goes for Simon Says

Wednesday 25 May 2016

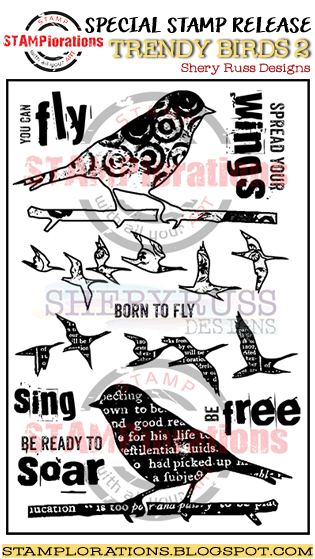
Special stamp release- Trendy Birds 2 Blog Hop


Hello my dear crafty friends and welcome to STAMPloration special stamp release blog hop.
Here is the first stop for you to hop.
Please visit all  designers on this blog hop and leave them a comment. One of the commenters can win this stamp set!
Commenting closes on May 27, Friday, at 11:55 p.m. Pacific
Winner of the Trendy Birds 2 set will be announced on Sunday, May 29
And if you are not the winner- you still can get this trendy set at 105 off here for one week till June 1. 

And here is my project for this hop: altered envelope gift card  holder.


I made the bag from Kraft envelope and embellished the front using ARTplorations stencil with texture paste and paints . The stamped panel was stamped with clear embossing ink and heat embossed with black embossing powder. Then it was painted over to fit the matting. I added a clips with twine for the closure.
I really hope that you like my project and this totally perfect stamp set!


Now go to the next stop in your hop and remember that you can WIN!


Little Birdie card with TPD


Hello my dear crafty friends and welcome to my last May Two Paper Divas post.
May is a month of Graduations. So to make a graduation card is just a must.
I used this totally general new A little birdie told me...stamp set and to make it fir for graduation I just added a sticker graduation hat. This is a perfect set for a lot of occasions- not just for Graduation.
So easy, so efficient.
I used a lot of Sizzix dies to make the background shape and the image matting with DCWV papers and colored the image with Zig  Real Brush colors. Let's say that this card with different colors- greens/blues/ can be perfect for a male graduate too.


I enter this card to Anything goes challenge for Simon Says

Monday 23 May 2016

Anything goes - Tando


Hello my dear crafty friends and welcome to my new post made for Tando Anything goes week.
This is a perfect week to make a perfect layout with my most perfect dear daughter wedding photo.
So with a little help of DCWV cardstock and with a lot of Tando products I made it.
 I used Tando stencil with distress ink to make the background - added some faux pen stitching over the stencilled images too.
Then I added Tando Clock chipboard  (do you see the slight clock image on the photo?  This is my own home clock there).
The title was made with 2 Tando chipboards that were partially painted and partially heat embossed.
I really like my return to scrapbooking. Not really a lot, but at least I try.
Promise more  layouts in the near future.


I enter this to More than words Moments and Clocks challenge
Anything feminine for Southern Ridge Trading 
 Scrap it with a song- Best day ever inspiration- My DD wedding day was sure best day ever for her and us
And to WOW! Embossing powders as each chipboard is heat embossed with their powders

Saturday 21 May 2016

Die cut clay flowers with Makin's Clay - tutorial

Hello my dear crafty friends and welcome to my first, but sure not the last clay flowers tutorial.


As this is my second year on Makin’s Clay® DT I can pretty much make any project I desire and right now I am in this flowers mood and from this month on I will do some different clay flower tutorials monthly for Makin’s Clay® blog.
The first one is a Sunflower tutorial and the techniques used are clay sheet die cutting and acrylic paints coloring over the dry clay.
Makin's Clay flexibility is just perfect even when we work with  already dry clay, so we still can reshape our dry clay pieces. The perfect ability to be colored with acrylics makes it possible to work with just white Makin's Clay and to paint the final shape into any possible colors.
So here is my tutorial for May- April showers sure brought us my May flowers!
Step 1:
Flatten a big piece of white Makin's Clay using a roller from Makin’s Professional®Roller and Cutters  set®. You also can use the Makin's Clay Ultimate Clay Machine on setting 5, but for this project I decided to use the roller only.
Let the  rolled clay dry for a few hours.

Step 2:


Die cut the dry Makin's Clay sheets with Sizzix Sunflowers die set. As you can see the set contains two dies that build the flower, three  dies for leaves, the bottom die and the top die (the one with dozens of smallest possible flowers). I die cut the flower parts twice with each one of those two dies and die cut the leaves twice. The one parts were die cut just once. Do not push the small flowers out of the die cut sheet for now; it's almost impossible to pain them out  of the sheet.

Step 3:


Add shaping to the die cut clay pieces using Makin's Clay tools from Makin’s Clay® Professional Clay Tools® .

Step 4:


Paint the shapes with acrylic paints. I used DecoArt Mixed Media line paints, but with Makin's Clay any acrylic paint works just perfectly!
Let the shapes dry and don't forget to paint the white backs too.

Step 5:


Arrange the painted dry leaves over a circle of black Makin's Clay and use Becon Fabri- Tac to adhere shape to shape. This is the glue I have and it works just great with Makin's Clay too.

Step 6:


Arrange flower parts as shown over the glued leaves.
 Step 7:

Paint the small top flowers with a mix of DecoArt paints and now push them of the die cut sheet.
Step 8:


Glue the painted flowers on the top of the sunflower.

 Step 9:
Make the background using Makin's Clay in black, Makin's Clay  roller and Makin's Clay texture sheet (woodgrain) from set D. Cut the background to the size that fits the photo frame.

Step 10 and final:
Glue the black background  over the glass inside the photos frame. Cover with glaze and glue the sunflower over the background. Cover the sunflower with glaze. Let it dry and enjoy your first  Makin's Clay flower.


More to come next month and so on!

Products used:
Makin’s Clay® white
Makin’s Clay® black
Makin’s Professional®Roller and Cutters set®
Makin’s Clay® Professional Clay Tools® 
Makin's Clay® Texture sheet set D- woodgrain 
Makin’s Professional® Cutting Mat

Other products:
Dies- Sizzix Sunflower set
DecoArt paints
Becon Fabri- Tac glue
Photo frame 4*6''


Popular Posts