Wednesday 29 April 2015

End of the rope card with Two Paper Divas


Hello my dear crafty friends! This is my last card made for Two Paper Divas stamps and this time it;s a kind of clean and simple card, also over the patterned paper.
I wanted to use this lovely big sentiment and as the main word there is a " knot" I looked for something to tie. And those balloons over PHP paper were just perfect.
 I cut the background, added strings with a knot and added some 3d glaze over the balloons to make more interest. Then I stamped the TPD  sentiment and my card was done.
I used TPD End of your rope stamp with heat embossing over the patterned paper.


Tuesday 28 April 2015

Recycle your supplies: make your own background stamps


Hello my dear crafty friends!
This is my new Bella blog post and my own , easy to make, background stamp tutorial.
You can visit Bella blog to see the full tutorial there!

I just add here the supply list if you want to know the products name right now and here. But as I already said- go to the full tutorial and you  can do  this background stamp too!
Supply list:
Stamp: Rubber Dance  Beach Memoirs stamp
Red  rubber: Rubber Dance
Inks: Clearsnap, Ranger
Embossing powders: Clearsnap
Cardstock: Recollections
Mist: Ranger
Color blender: Clearsnap


Monday 27 April 2015

Make wearable art from your mistakes

Hello my dear crafty friends! 
This is Irit here again and this time with a story. This is a story of making mistakes and then re- making them into something nice. Kind of from " trash to treasure" thing, but it's my trash and my own treasure after all.
It's a crafty way to take your mistakes to another level and to think about them as a way of  your own creativity development.
So this how it was at the beginning: I decided to make a bunch of casts with ETI Resin jewelry mold and to add stamped images on the back. For this technique I needed the very clean and clear casts and I was sure I am going to get them. So I used Casting Crafts Mold release conditioner  spray and waited over night  for my dry mold.
Seams to be right? So I thought.


Then I  mixed the Easy Cast resin and I worked by book. Sort of. On the way something went wrong and my casts  very so full of little bubbles that it looked white. I am still not sure  what went  wrong on the way.
 I worked  by the book. I mixed it for the right time. I made it two steps. I used a torch to heat the bubbles out.  Maybe it was cold in the room? I am not sure, but the only thing I can think about was the room temperature and I forgot to warm the bottles in hot water. So here it was- good casted pieces in this  white bubbled color that were not good for my original idea. But  then I live in Israel and I can't get products without waiting 4 weeks for their shipping. I can't let it go to the trash bin. No way! I need Plan B.

And my plan B was to color the milky pieces and to stamp over them and then to connect them into double sided charms. And lucky me- it worked! Almost...(This is a time for the sad face icon...)
Some alcohol inks, small nice butterfly stamp  from  RUBBER DANCE ANTIQUE BOTANICALS SET with permanent black ink and my pieces were magically   reborn.

Here you still can see the milky back of one of the pieces.Bubbles- bubbles- bubbles everywhere.


Now I found this " my"  way to connect those pieces  into a wearable shape. Yes, I mixed a bit more of Easy cast to glue the wires inside. 24 hours of waiting again.


 And my finished necklace was really  pretty before I made another mistake! Huge one.
 I used Resin Spray Clear Gloss Finish over alcohol inks. And I lost the brightness and  a lot of paint in the process. BIG NO! When you use alcohol inks don't use resin sprays! But then this whole piece was a lesson .  Good one. Long one. And I am happy to share it with my readers.


Sunday 26 April 2015

Miss u card- CAS made easy with Ann Butler's products


Sometomes we need a quick card that is simple and then not so simple. Using Ann Butler's new Clearsnap background  basics stamps makes it possible.
I stamped this square stamp twice with Snow Clearsnap ink and Clear Clearsnap embossing powder and then   inked it over with Ann Butler's Tangelo, Sunshine and Limelight Crafter's Clearsnap inks. 
The sentiment is just a die cut and it was made for a long distance friends.

Saturday 25 April 2015

Vintage hanging with ETI


Hello my dear crafty friends and welcome to my new ETI post!
This time I went totally out of my comfort zone and made something that I was not sure  becomes a finished project. But  as you can see- it was a success and I will sure make more of those " papyrus like" pieces in the future.
So here we go:
1. Took a piece of clear thick transparency (not seen, as usual) and spray it with a good layer of ETI Mold Release Conditioner. Let it dry and add another layer (dry it please, again).


2. Take a plastic lid  around the transparency size and put the conditioned transparency over the lid.
Mix a a full small container with Easy Cast Resin according to the manufacturer's recipe and cover the transparency all over. Now let it dry like 2 days and remember to cover it with some fabric or paper  as we don't like all this home dust to invade to our clear casted piece.


3.Now go you your "oldies, but goodies " craft supplies and get this 2 step crackle medium. If you don't have this one, you can find one step in the stores. I just have those old jars of 2 steps and the good thing with them is that you can see this Step 1 coverage as it's white before it becomes clear and you can see the " Papyrus shaped" casted piece over the lid.
Let the Step 1 dry and then add Step 2 (it's clear one  and not shown on my tutorial). Let the second step medium  dry and you have an " old crackled " clear piece to work with on your later steps.


4. Add two eyelets over the dry piece using your favorite eyelet tool (wee all have one, also we forget to use it. So it's our " eyelet time" right now. 
Find some good acrylic gold paint and cover the whole crackled piece with a think acrylic layer. Then wipe it with paper towels or even baby wipes. The paint will stay inside the crackles, but the main piece will be pretty clear after this step.


5. Find some tissue paper and stamp your scene with black permanent ink. I used Rubber Dance company  Antique Botanicals stamp set  with vintage flowers and butterflies here.


6. Glue the stamped flowers on the back side of your piece (you can see it from the eyelets). Use a small portion of ETI Easy Cast Resin to make this step and then.... OK, you know: wait till it's dry!


7. Now grab your alcohol inks and cover the tissue stamped  paper with a nice mix of them. Don't afraid to see the very intensive colors. We wouldn't see them this way from the front of the finished piece.


8. Add some lace or ribbons as a hanger to this piece. I even added a butterfly golden charm.
Look how nice this piece is from the front: mute, vintage, really old looking. 


As my only tip here- make a few " papyrus" piece at once. The waiting time is  long and each and every  caste piece is UNIQUE!

Friday 24 April 2015

Celebrate the great day


This page was published in Create magazine March issue.
Hello my dear crafty friends and welcome to my showcase of Paper House Productions Snapshots  stickers.
For those who are new to this product- those are adorable photo stickers with add -ons on  some of them and it's just so easy to use and so lovely to add to your scrapbooking, cardmaking or all other paper projects.
For this showcase I made this lovely summer layout with photos of my adorable grand babies celebrating Jewish Holiday called Shavuot. This is an early summer Holiday we celebrate as a tribute to nature and to all things mother nature gives us and this is a reason they hold a basket full of veggies and fruits and wear this flower bouquet. (The little one  doesn't like anything over  her head, so it stayed there for a second only).
The easy way to make garden page is just to use PHP Garden paper pad. Period. Any single paper from this pad will do the job, so I picked a couple and hand cut big images to overlap the background paper.
I also added inked over stencil flowers, lot of  home die cuts made from the patterned paper and then I played with PHP stickers.


Products  list:
 Paper House Productions
Other products:
 Dies- Die- Versions
Mask: Memory box
Inks: Ranger 
 Step by step instructions:
1.Use green and yellow distress inks over the flowers mask and add the images over the background patterned paper.Hand cut the flower watering can and the strawberries and glue them on both corners as shown.
2. Die cut the hexagons background and adhere it over the page. Glue both photos over the die cut background.Die cut the bow and glue it to connect both photos as shown. Hand cut the " Home grown" circle and glue it on the bottom as shown.
3. Adhere all 3d stickers over the photos and over the hand cut circle. Add 3snapshots stickers on the top of the photo and one extra on the can.
4. Die cut the  Celebrate sentiment from patterned paper and the " great day" sentiment from a piece of red cardstock.Make your mixed die cut title over the photo.
 I entered this project to Let's get arty challenge blog for Alter the patterned paper background. I used mask and inks over the patterned background here.

Thursday 23 April 2015

Spring resin box with micro beads

Hello my dear crafty friends and welcome to my easy to make new ETI post.
This time I decided to make something easy and to show how ETI products can be used with your old and hoarded stash.
So I took one on my black and white old painted wooden boxes (I used them for embellishments before I found that I can't find anything inside and moved to flat ones) and decided to recycle it to this lovely Spring box using old molds I have for maybe a year and never used and even older micro beads.
As a first step I mixed a small portion of ETI Easy cast resin  with just a bit of fine green glitter added to the mix made by manufacturer recipe. Please remember my previous mistakes and heat the bottles a bit in a warm water container before the mix!


Here you can see the  casted leaves after like 24 hours and there are some residuals over the cast. Take good sharp scissors and just cut  all extras away. As it was  only 24 hours since the casting, the extras were pretty much flexible and easy to cut. 
 Now I casted blue glittered flowers using two roses molds from my stash. Those flexible molds do not need any conditioner- just cast, wait 24 hours and pull! Clean the molds after the casting even if they look pretty clean! 


 Now to the final stage- arranging the casted pieces and adding my micro beads.
I made another small portion of Easy Cast and used it to glue the leaves and flowers over the glass lid. Perfection! It's invisible and will be glued forever over night. 


Now I made a good spread of the remaining resin mix with the ETI brush from Mixing cup set and filled it over with a mix of blue and green micro beads.


I really love how those small beads look over the glossy surface.


I hope you like my easy to make  resin project and will try to recycle your old boxes in a similar way.

Wednesday 22 April 2015

It's your day... Enjoy! tag with Two Paper Divas


 Hello my dear crafty friends! This is new post made for Two Paper Divas and this time with this gorgeous doodled  Sweet Blossom  stamp and a sentiment from It's your day set.
And this time I decided to make a tag. Tags are trendy. Tag are different. Tags are useful. Tag are totally me. So here it is- my shabby tag made with 3 hand made tags, three ribbons and two stamped and watercolored flowers.


Tuesday 21 April 2015

Love it card


Hello my dear crafty friends and welcome to my new Die Versions post.
Today I am going to share a lovely " Love it" card  made in this kind of a vintage style with a new, just released DV Closed  Umbrella die.
I used PHP papers and stickers and added Umbrella die cut made with two cuts (kind of a shade or interest). I also added the Brick background and it was meant to be cut on the sided only.  I think that those die make this card a perfect Mother's day or Valentine gift.


Monday 20 April 2015

Sing , Love, Fly: art board with Makin's clay, Rubber Dance and Tando


Hello my dear crafty friends and welcome to my very first post made for Makin's Clay DT.
I know that clay  is mostly connected to small figurines or jewelry piece. But as I am a Mixed Media artist I am going to show you that clay can be used for Mixed Media pieces too.
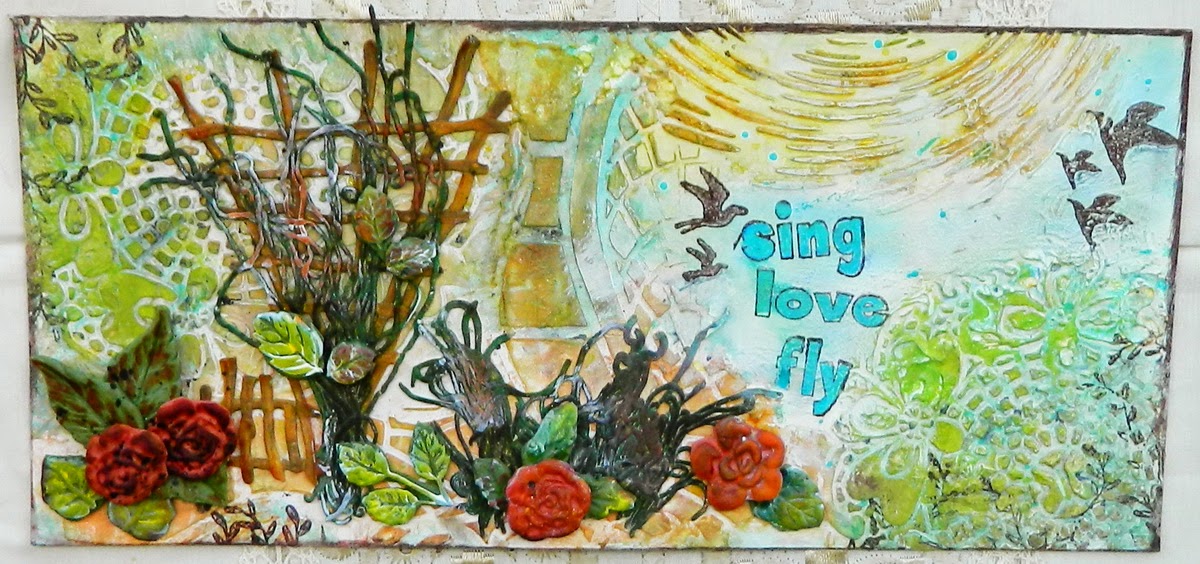
So here is my art deco made over a long thick white chipboard.
First I made the background with Tando Creative stencils and texture paste. Then, after it was totally dry I added some paints, inks and mists to color this background and now it was a time for my clay adventure.
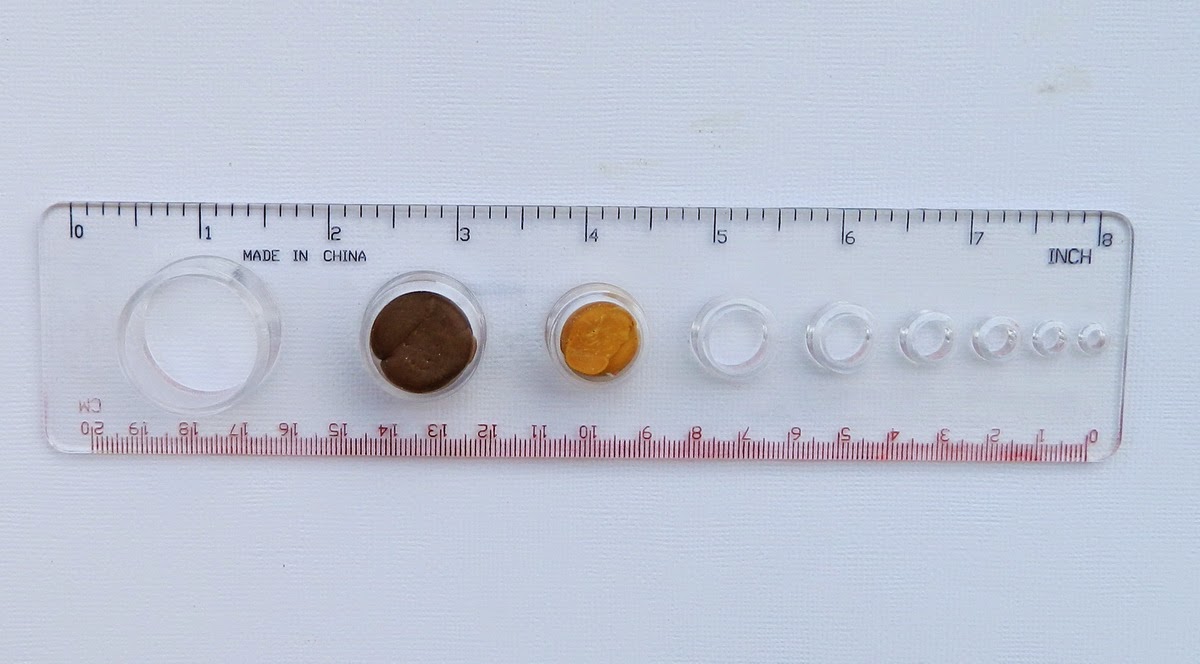
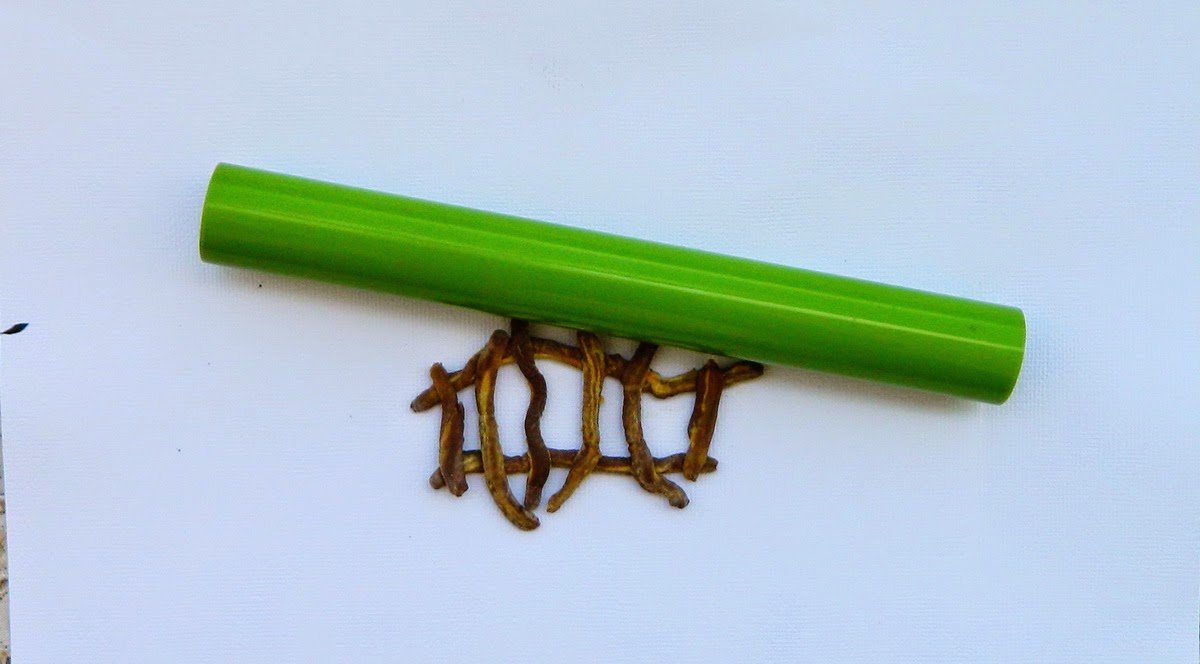
First I mixed Earth tones clay  pieces of Makin's Clay using this great mixing Makin's Clay Mixing Ruler.
Makin's clay comes in a wide range of colors , but you can make it even wider with this Clay Mixing ruler. I used Earth tone colors Adobe Brown and Light Adobe to make this " wood" color.


Next I made those " wooden" strips using Makin's Ultimate Clay Extruder. I don't yet own one, but then I do have a lot of crafty friends and so I got the tool to use and  I sure need  one for myself.
I made " wood" pieces with 7 dots disc and then arranged then to a funky fence.


As the next  step I decided to flatten the fence a bit and used Makin's roller from the Roller and Cutter set. 


From here you are not going to see more " step by step" photos as this post begins to look like a 700 pages novel. So here are the next step in a " fast mode":

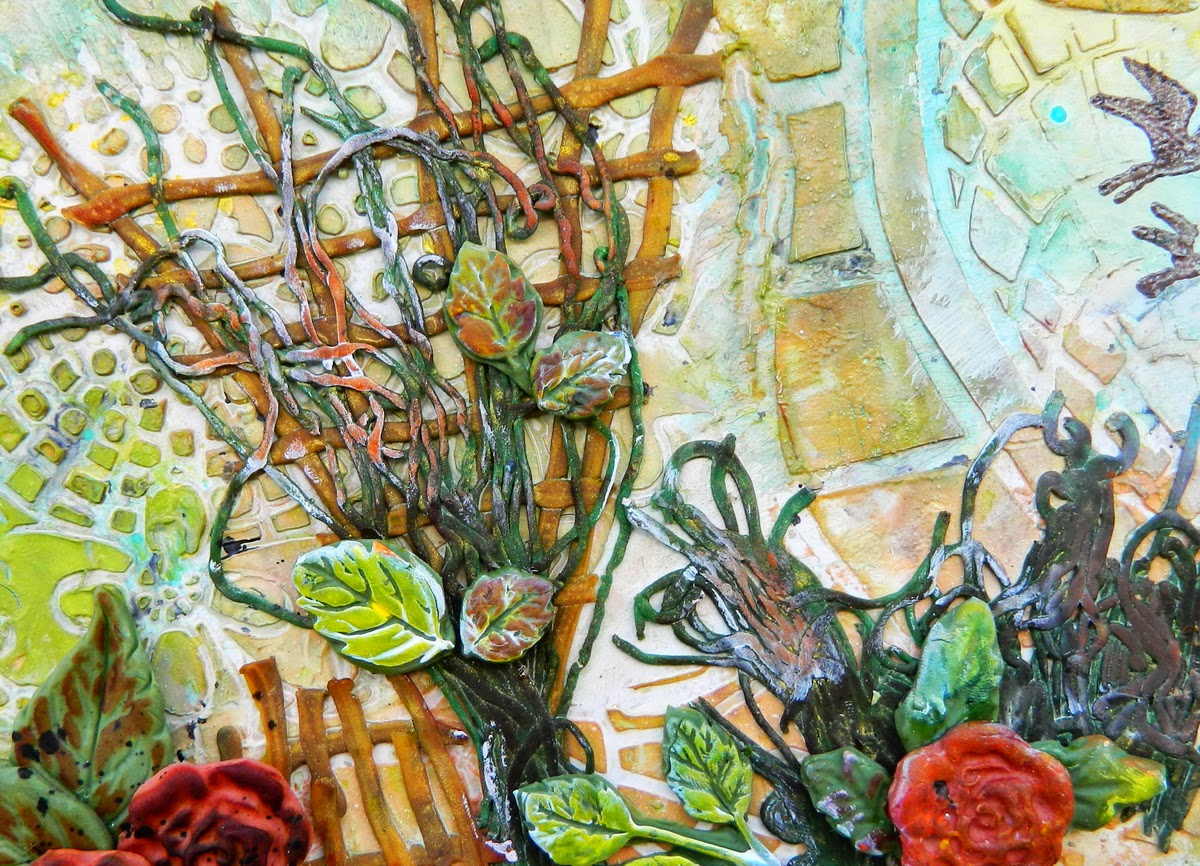
I made another tall fence as the base of the branches with the same " wood" color and the same technique.
Then I moved to  another extruder disk and another color mixing.
I made green mix of clay with Green, Terra Cotta and a bit of natural color and used 12 holes disk to make my " grass" strips.
The strips were totally thin and already curled, so I just made those short and tall grass and flatten it with my roller. Using some gel medium I glued those (not yet dry ) piece over my textured board and let them dry overnight.
As the next step I misted all the piece with light golden mist and my clay pieces  got this shine effect on the top.

 The next part of clay work was a fun!
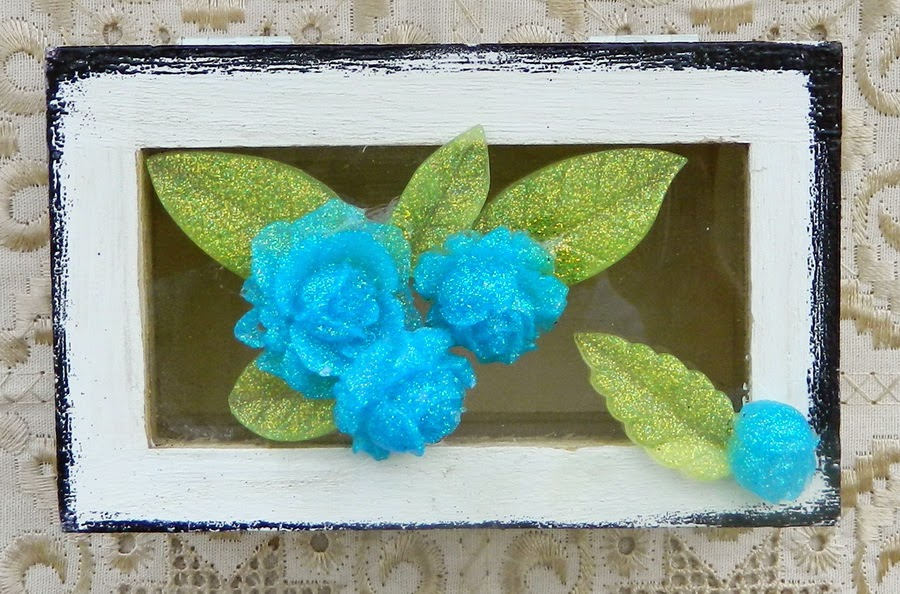
 I mixed some reddish colors with Red, white and yellow clays and made some flowers using Makin's Florals Push mold. The colors were still too bright for my taste, so I added a bit of distress inks over the dry molded flowers.


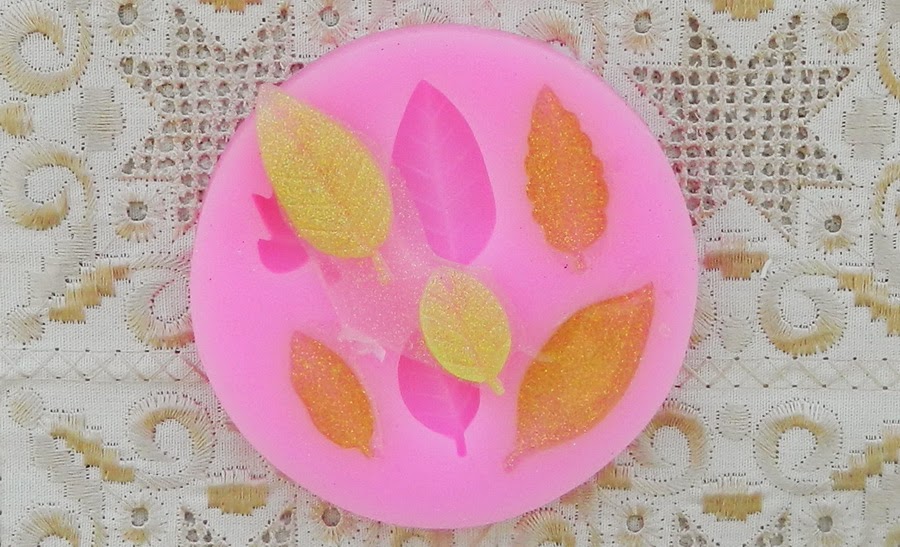
Next the leaves were made with a mix of Olive, white, green and some brown clays and molded in Leaves push mold. Again, for my style of crafting, the colors were too bright and I had to mute them with a bit of white gesso and some light distress inks.
All the leaves and flowers were arranged over the background grass and fences and this piece was almost done.
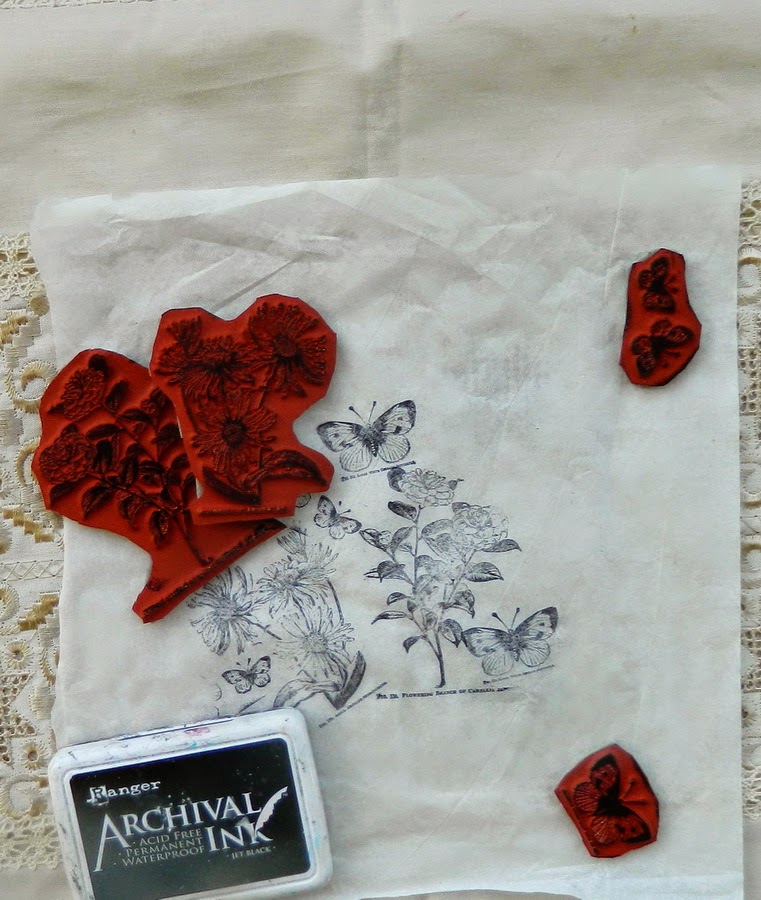
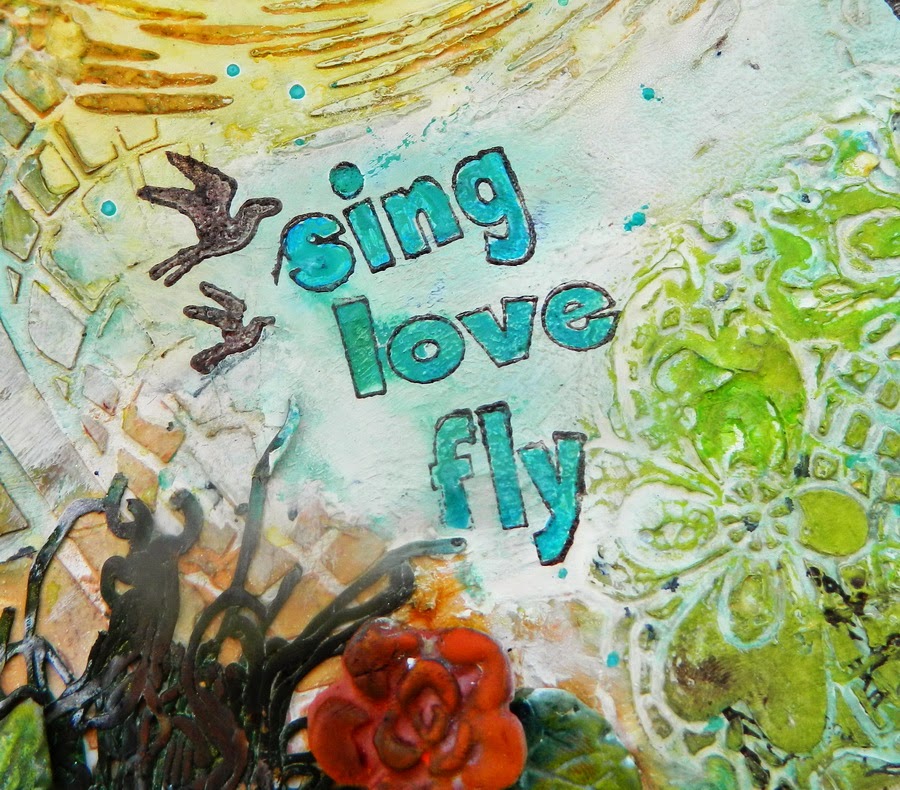
But not yet done. Art piece should have some " saying". So I stamped this " Sing, Love, Fly" words using Rubber Dance  A little Birdie stamps from this gorgeous set  and  as I was  into the stamping, some leaves and birds were stamped over the board too.


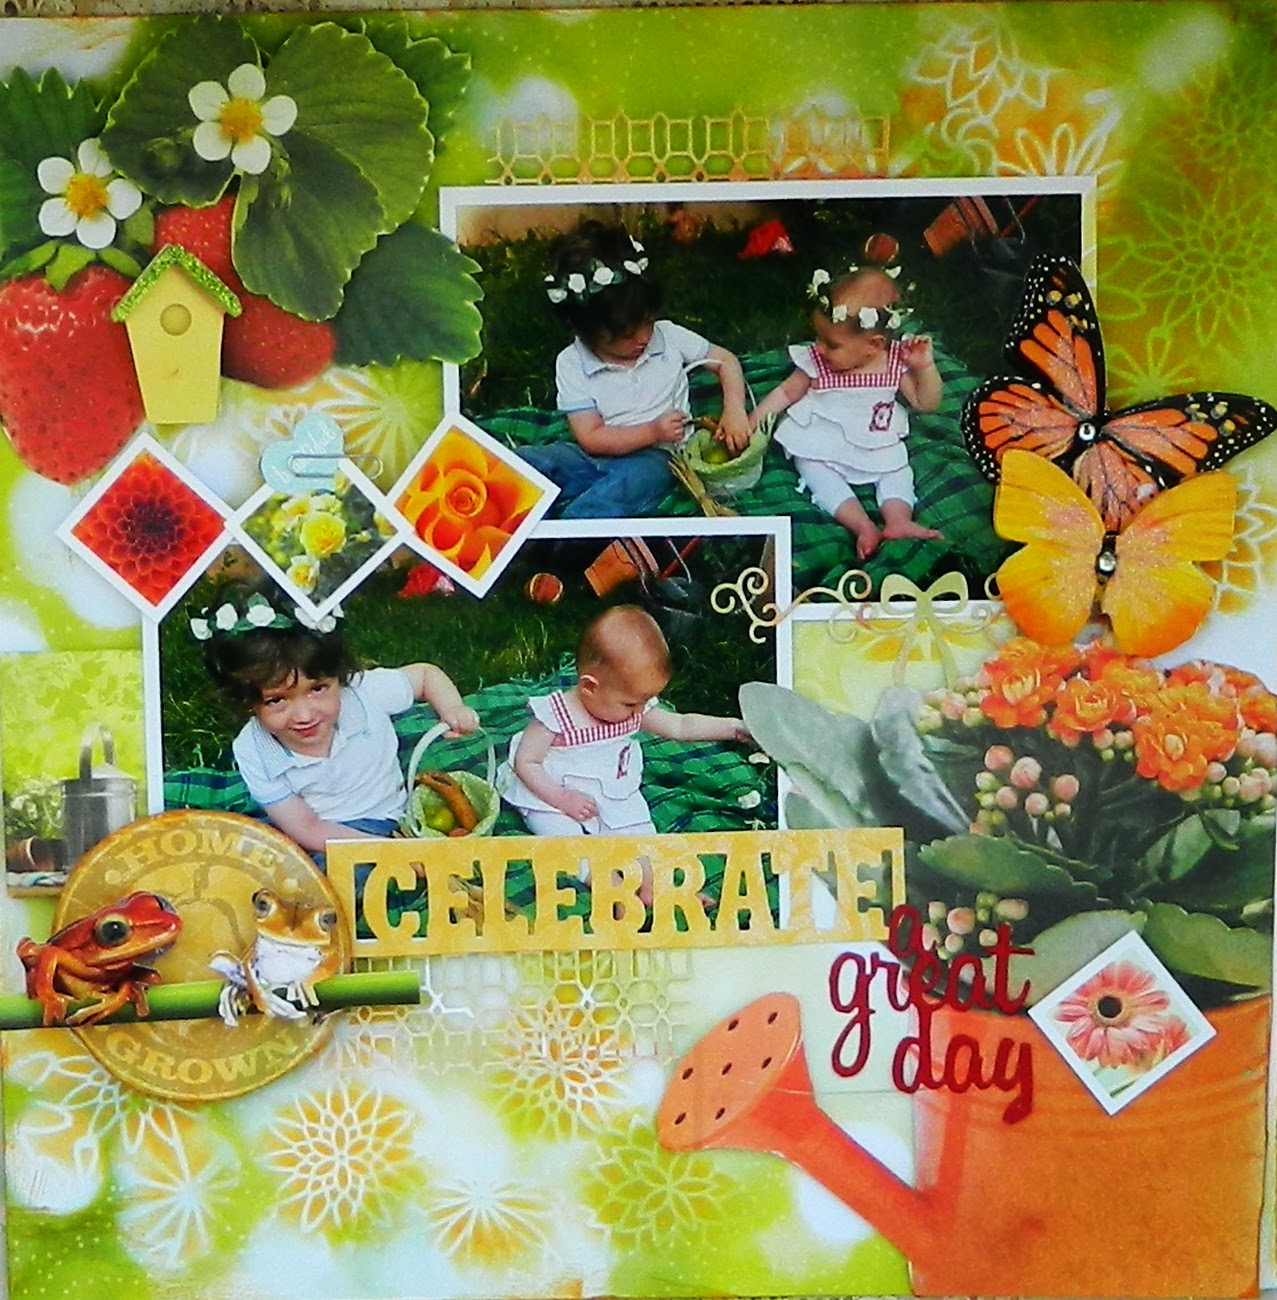
This is a final project and I think it's a good  Mother's day gift to my Mom (also she would probably want  some " real thing" )


Hope you liked my post and my Makin's Clay project and see  you next month!

Sunday 19 April 2015

Just Bee cause card with IBS

Sweet " Just Bee cause" card made with Inspired by Stamping new March release.
 I stamped the basic image and heat emboss it and then added another layer on the top with red  ink and heat embossing and hand cut. The whole image was painted with yellow ink and misted over a bit with  yellow mist.

Saturday 18 April 2015

1st Birthday : Big Little Girl lo


My new fancy layout made with Paper House Productions papers and stickers and my dear granddaughter best ever photo.

Layout introduction:
With all Mixed Media scrapbooking, mists, masks and paints, we almost forget the simple and cute scrapbooking style. This layout is just the pure scrapbooking as it was a few years ago. Some cardstock, some patterned paper, some basic punches, a lot of good stickers and one lovely photo are the basic products that actually made this lovely bay page.
Supply list:
Paper House Productions:
Country floral pattern paper
Country girl collection Horse paper
1 st Birthday  girl 3d stickers
Happy Birthday 3d stickers
Other products:
Pink cardstock: AC
Punches: EK Success, Martha Stewart
Ink: Ranger
Bling: Flourish with a Bling, Paper Studio
Step by step instructions:
1. Punch around the floral paper with a mix of punches and tear around the punched edges to make it a kind of a square. Ink the edges with Tea Dye ink. Adhere the punched background over the light pink cardstock.
2. Cut a few random rectangles from Horse paper, punch one and ink them all. Arrange all paper rectangles as your photo matting and glue the 5*7'' photo over the matting. Cut a small rectangle strip of the same floral paper, ink it and adhere on the left lower corner.
3. Glue all stickers as shown around the photos and over the paper strip on the corner. Add bling corners and randomly glue some rhinestones over the black photo


Thursday 16 April 2015

Welcome Spring - acrylic wall deco


Doodling can be a hard job for those who are not familiar with this technique. But if you have already doodled cardstock and all you need is just to add some of your own doodling, it becomes an easy and even fun process. The Tattered Angels Tangled cardstock is exactly this kind of doodled paper and it was easy  to add a lot of small flowers, leaves, lines and dots with a very fine black pen and then to color it with a nice fine tip sparkling Spica markers.


Supply list
Fragments- Tim Holtz for Advantus
Markers- Spica-TooMaker
 Cardstock: Black on Ivory French script- Canvas Corp
Specialty paper:  Tattered Tangles Quotes, Stripes-Tattered Angels- Canvas Corp
Sticker: Paper House Productions
Water colors: Gelatos- Faber Castell DMC
 Pen- Pigma Micron 008 Black

Step by step instructions:


1. Cut a piece of French script cardstock and paint it with a mix of pastel Gelatos. Glue the colored piece on the back of the biggest acrylic piece that is going to be our project base.
2. Cut Tangled cardstock piece that fit the small acrylic fragments. Doodle over the pieces with fine black pen: add small flowers, leaves, dots, strokes etc.Color over your doodled pieces with a mix of light Spica markers, such as pink, green, blue and yellow.
3. Glue all colored pieces under the fragments and glue the fragments over the basic fragment as shown.
4. Glue the title sticker in the middle. 


Wednesday 15 April 2015

You are " Tie'rific" card with Two Paper Divas


 Hello my dear crafty friends and welcome to my weekly Two Paper Divas post.


Today I am going to share a masculine card and as hard as it usually is to make those cards, with TPD terrific masculine stamp set called For a Special Guy, it was really easy job.
I used masculine patterned paper from PHP and stamped every image over Kraft cardstock with the same ink colors as the paper ones. Each tie was hand cut and glued with 3d foam glue and I added a few cork stickers to add some more texture and interest.


Popular Posts