Friday 31 January 2014

I love you box with mini cards

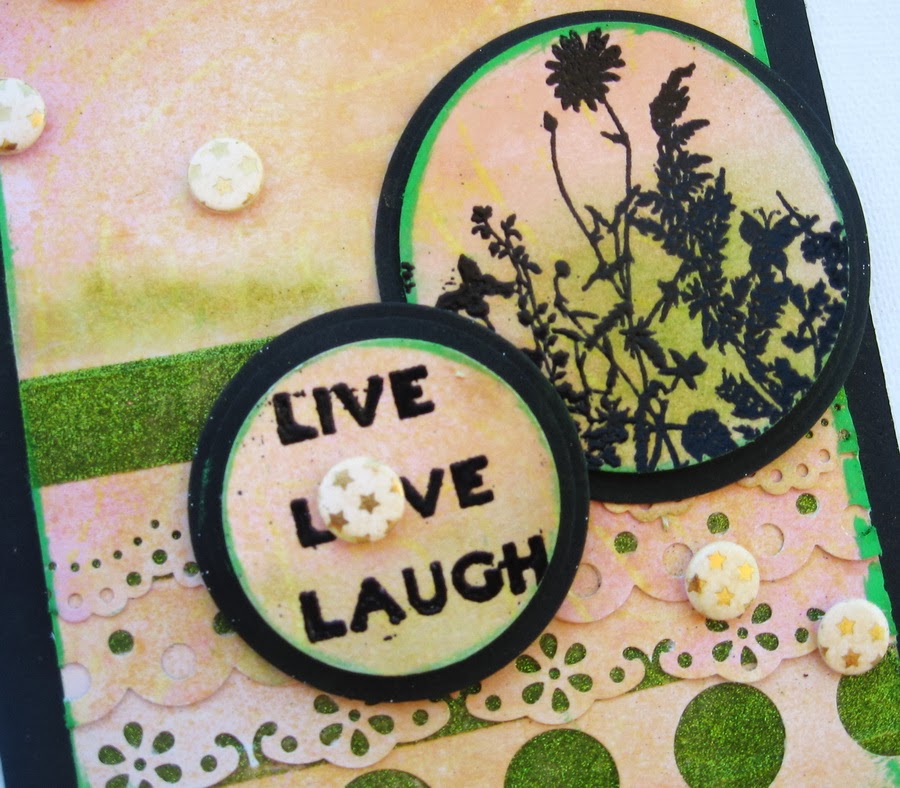
This is my new project made for Inspired by Stamping blog with  the new and gorgeous January release.
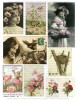
This is a very small clear box, upcycled to this lovely box with mini cards set. The box is a package from adhesive lace roll and is just perfect for very small cards. 


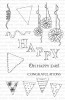
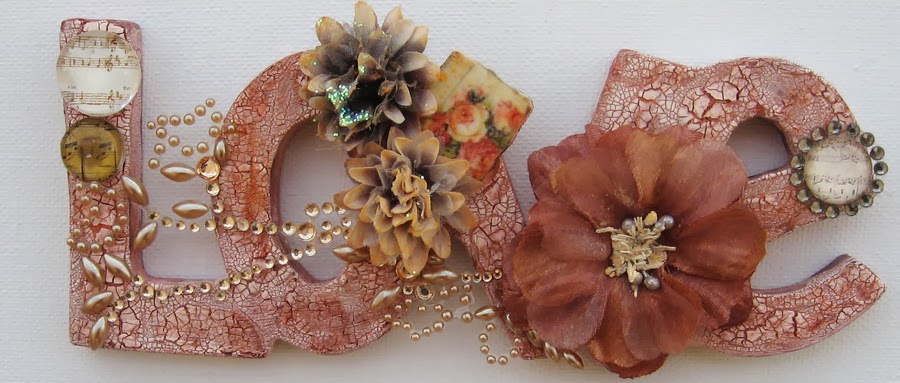
So first I made a few scalloped square die cuts from Lilac paper pad and inserted one doily die cut  too between them. I made the flower cluster and a bow and then added the stamped I LOVE YOU  sentiment (covered the BECAUSE as there is no space for the long sentiment over a tiny box). Then I made 3 mini cards with smaller square die cuts from Lilac pad and stamped the sentiments under the square. 


The longer sentiment was a bit tricky to stamp, but I managed to do it using scraps as masks.
    It's a lovely project to make for a girl friend, daughter, sister or Mom and to add a small jewelry piece inside the box.

Wednesday 29 January 2014

Triple L punched only card

This is a card I decided to make for Cards magazine Punches challenge: using punches only, no chipboards, no dies...  Hard one. I think  I like the outcome and hope they like it too.
I made the background with 5 different border punches and added glitter to fill the glue stripes that were still bare and then added another glue strip with the same glitter on the top.
The stamped part was made with W0W! stamps , punched and misted a bit over. The same thing was done with a sentiment stamp (3 stamps on  one circle).


Tuesday 28 January 2014

Sweet Stamps challenge: Hearts and lace


Hello my dear crafty friends and welcome to Sweet Stamps HEARTS AND LACE week!
My new fancy and vintage style tag was made with 2 new cling AF SS new stamps, a lot of embossing and a very new for me Globcraft and Picollo chpboards and embossing enamels. I added a bit of FWAB goodies for a more interest and misted all tag with a lot o LSG  mists. 


And now it'd your turn: play with us, enter our challenge and even WIN!


I enter this tag to some challenges too
Tag- for Love to scrap

Monday 27 January 2014

PWP Mixed Media Monday


This is my last for this term project made for PWP blog. This time I made a gift card holder/bag with Tim Holtz glassine bag that was dry embossed with his folder and then heat embossed over with pink powders.
I used PWP clip images- the fairy girl, the bird and the flowers were just cut out the clip sheets.
The wing was covered with pink fine glitter. I stamped this some hanging flowers on the bag bottom, but it's hard to see after all. The O, Happy day sentiment is stamped on the bottom.


Sunday 26 January 2014

Love is in the air- with some alteration

A very old wood piece that I bought for #1 was in my closet for ages. I think that it's a good timing to alter it and so I did.
Ranger crackled paint and some Lindy's Stamp Gangs mists over the paint gave me this vintage shiny , but mute look (I used A bit o' Bubblie,Bodalicious blush and Cream Bake Beige mists here). Then I added some Prima flowers, blings and a tile and altered the flowers colors with the same mists too.
I enter this to LSG January color challenge.


Saturday 25 January 2014

Fun with my grandson

New funny page made for a few challenges.
I used 7 dots papers - mixed collections, Tando mask with molding paste, LSG mists all over the page, Creative Inspirations chipboards misted , some FWAB blings ad pearls and one wood clock shape.
Apart of long drying time of the masked paste, this is  quite a quick page to do. Misting is fast and fast drying too. Cutting the triangles takes seconds. Gluing the embellishments with glossy accents is an easy, also not so cheap way and to cut an image from your photo  takes a minute or so. 
This is want I call " light Mixed Media page": you do use masks, mediums, mists etc, but then all products are " seen" and you still can say the product brand name. 


And now for the challenges:
Polka dots challenge for Frosted designs
Geometric shapes with their products for 7 dots
 Sketch for Purple Pumpkin
 Seilife style - mood boards- colors, feelings

Friday 24 January 2014

Cute friends

It was quite a long time  since I made something for Prima challenges.I love this company a lot, but since they stopped to showcase the best projects over their blog, but the winner only, I moved to another challenges. But hey, I got my Prima grab box (with shipping 150% of a  box cost... ), so I have a a lot of new, for me, products and this is a perfect timing for making some Prima challenges.
So here we go- not " light", but a real Mixed Media all Prima page.
A lot of masking (some masks are from Tando, some from Prima), stamping- all Prima, misting- LSG mists are the only one I have and use), then I added some  extra layers with fabrics, net etc and made the focal point of this challenge sketch with some Creative Embellishments chipboards. All other products are pure Prima: cards, mirror cuts, flowers, wood flag,  pebbles, blings, lace  and a very lovely photo of my grandson's little hands " playing" piano with his good  little friend.


I enter this to A2Z Scraplets Something new challenge- this " heavy Mixed Media" is really new for me as my style in MM is totally light. Then all products are new too- I just got this Prima grab box a few days ago/

Thursday 23 January 2014

Fancy card with Inspired by Stamping January release

My new and fancy card made with Inspired by Stamping new January release gorgeous Vintage Roses set and Vintage Floral paper pad. 
Yes! IBS now produce paper pads  that are made especially to coordinate with our new stamp sets.


 I used a few papers from the new paper pad- some just trimmed and some die cut (doily and lace dies). Then I added adhesive lace, hand cut a few roses out of the paper and made this vertical cluster.
The last, but not the least ,was this stamped  sentiment I love a lot and then I decided to look for a chipboard that fits the circled sentiment size and Bingo, I found this clock with a bird in my stash.


A few pearls were added over the card and I really like the final result. Hope you like it too. And now run to IBS  shop and buy this delicious set .I just used one stamp, but all of those stamps are MUST TO HAVE.
 And don't forget the paper pad- it's so easy to make a lot of lovely projects when you use the coordinating paper  and stamps.

2014 card

This is exactly a type of cards I like: the focal point is artistic, stamped, Mixed Media thing; the card out of it is a simple, but fancy.


 I made this one for Cards challenge: buttons/brads /bling. I don't see much bling here, but yes, I used 4 brads and 6 buttons. The gold embossed letters can count for bling. I think they can.


 I used Visible Image stamp, Staze-On 3inks technique, Wycinanka chipboards for a title, Tando puzzle piece; one punch, black cardstock, embossing powders and red paint from CIP.Let's say it's a tribute for  2 companies I designed for ( VI and CIP) and to 3  companies I still design for (Tando, Wycinanka, Wow! Embossing Powders).

I also enter this to Quick Quotes bright and shimy new year challenge

Wednesday 22 January 2014

Triple technical tutorial with Inpspired by Stamping

Hello my dear crafty friends!
Today I am going to show you a  tutorial with not one, not two, but  three techniques and  believe me, it would not be a long project to make after all.
So here we go- my TRIPLE TECHNICAL TUTORIAL made for IBS stamp company I begin to design for my third year.
1.Dry emboss a piece of thin metal sheet with your favorite embossing folder (I used Cuttelbug art deco frame).


2. Cover the outer part with Clear embossing ink and add some black embossing powder(I used one with some silver glitter inside)


Unfortunately I didn't  take a photo of a finished frame only, but you will see the lovely embossed effect over the finished piece. Or just scroll down to see it now...

3. Now let's make the inner frame with Faux Cloisonne technique. First make your own chipboard frame or find a frame that fits the inside part of your outer embossed piece. I made mine in seconds, so you can do it too. Now grab your Clear embossing ink and black Ultra thick embossing powder (UTEE or any other company)


Cover the chipboard with a thick ink layer, add powder and heat emboss it. Make it all around and with several layers until you get this result.


4. Now grab some Pearl Ex powders  (you can use Perfect pearls too or any other kind of pearl pigments you own). Cover the COLD frame with a mix of not more then 3 colors.


5. Now the fun begins.You  need to work over small parts of your frame and to be fairly fast!
Heat  one frame side and stamp your border stamp into a hot border.Let it cool and repeat this step all over the frame. The good thing is that if you made a mistake or don't like the stamped borders, you can reheat the frame and to make it over.


6. Now for the inner part. Stamp your sentiment over the white thick cardstock with permanent ink only! Mist over the stamped sentiment with a similar to your frame color and let it dry.


Cover your dry misted inner card with a thick layer of clear embossing powder and heat emboss it over the sentiment.
Arrange your entire project and enjoy it!


And this is a word I picked as my " altered"word for 2014: TRY
I believe that everything is possible if you just try. Or dare. Let's see if I am right.
And now for some challenges too
Memacrafts- Bingo- the bottom line of Stamp- flowers- charm
 Anything goes with embossing and powders-for Sparkle and Sprinkle
 Bling- Card and scrap

Popular Posts